How to Make Over a Room for $500: A Step-by-Step Budget Plan
A realistic, dollar-by-dollar plan for transforming one room on a $500 budget — and making it look far more expensive than it cost.
By Decor Glam Chic · 10 min read
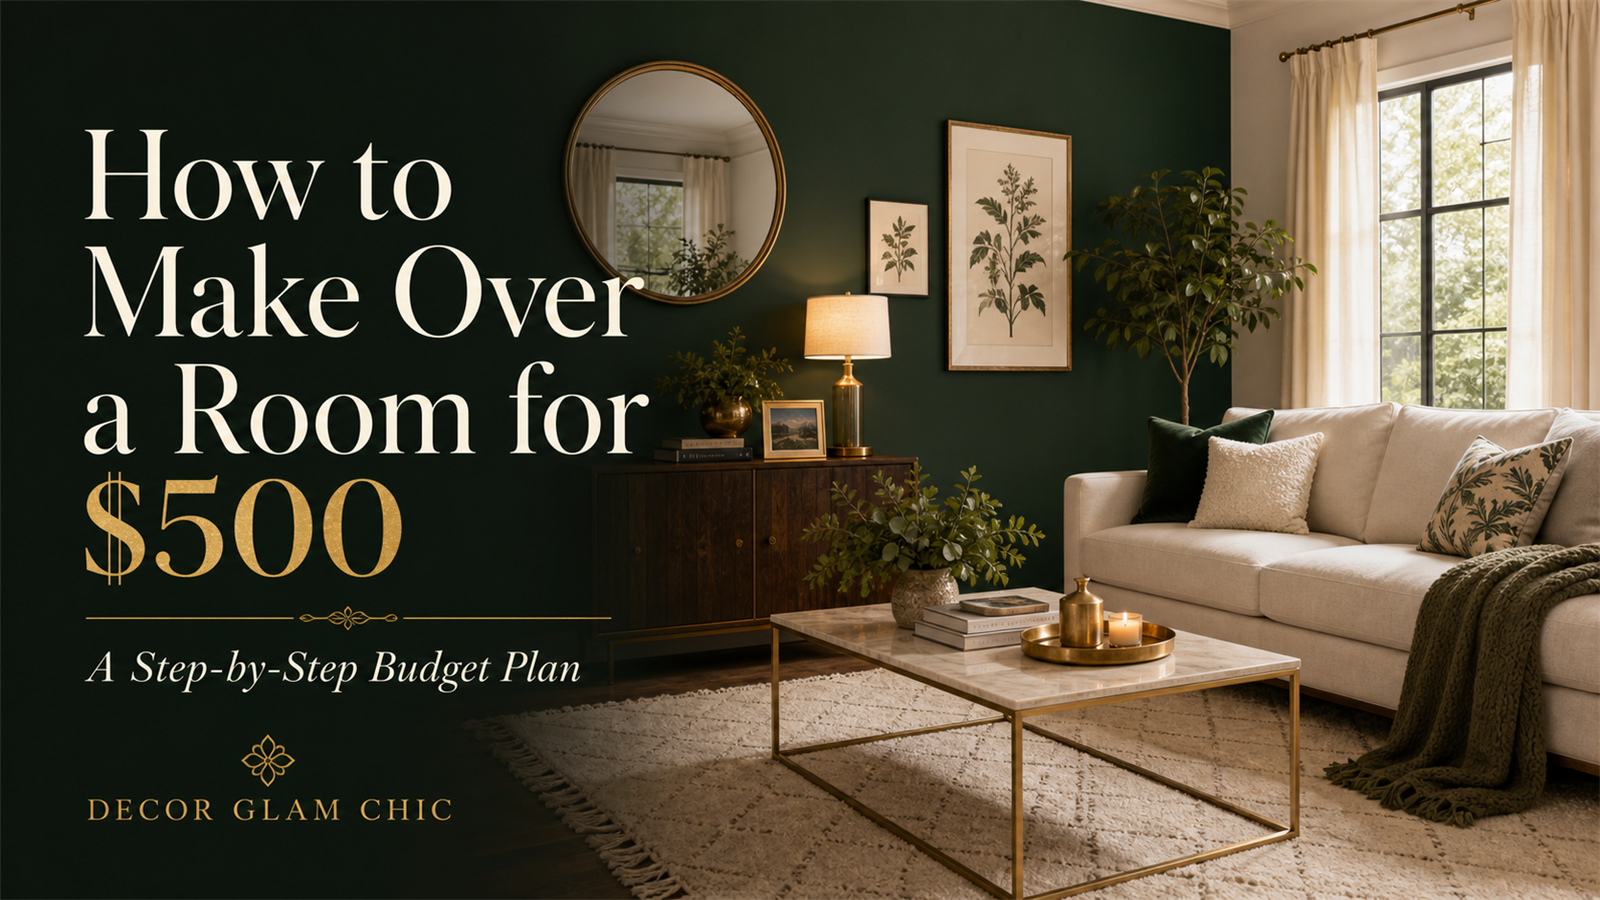
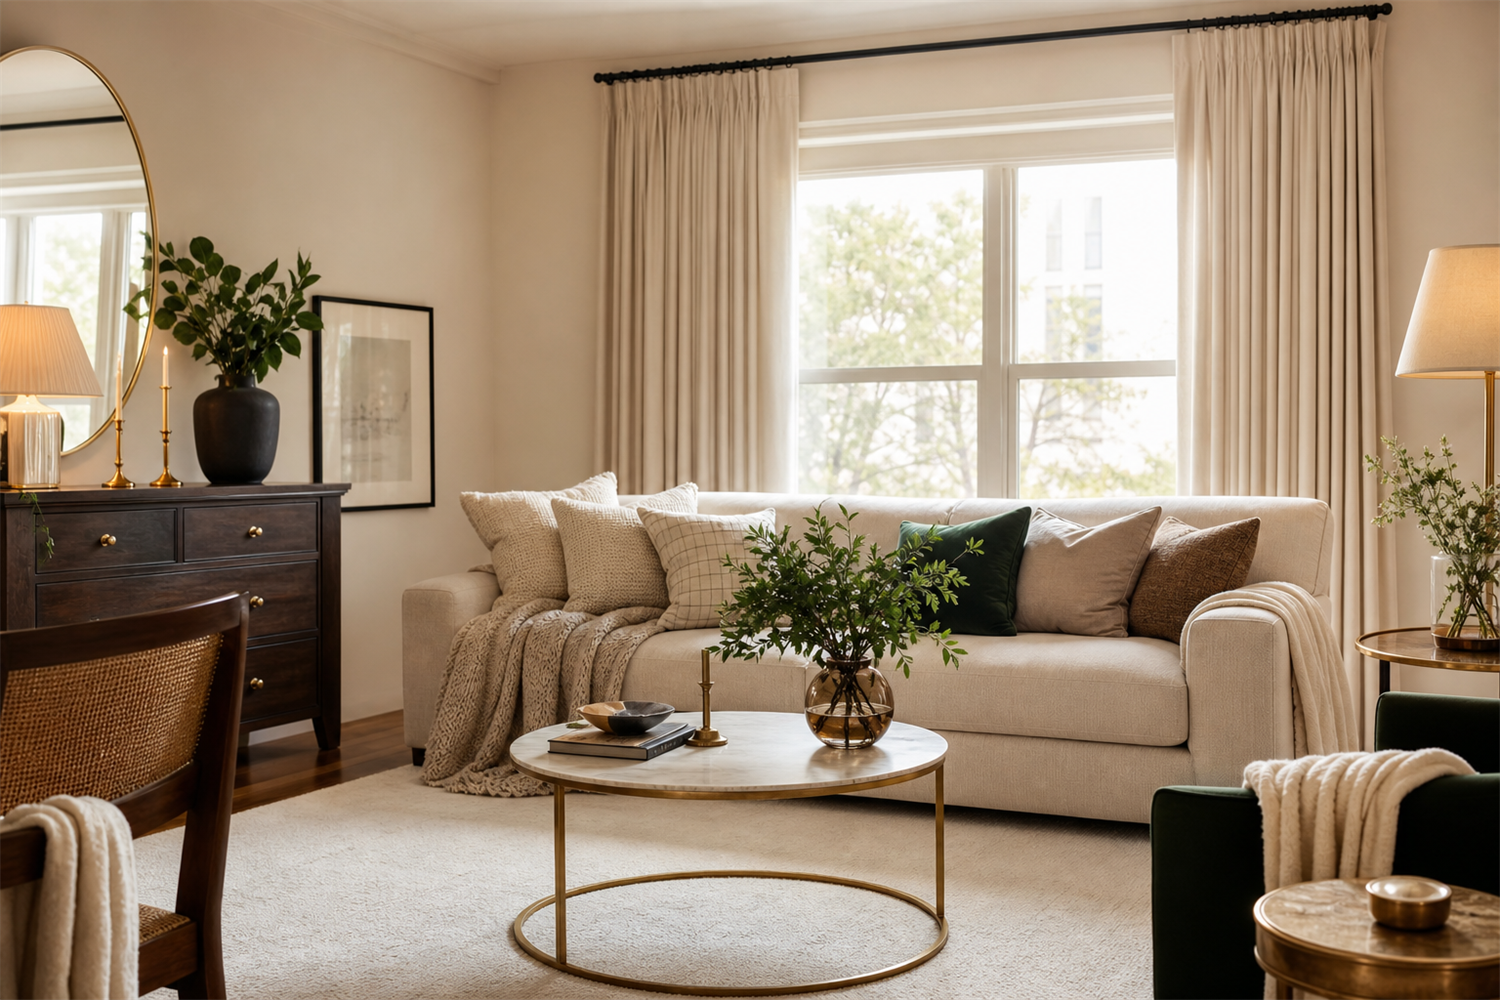
The finished room — made over for around $500, with the same footprint and big furniture.
This post may contain affiliate links. If you buy through these links, Decor Glam Chic may earn a small commission at no extra cost to you.
A $500 budget is not a compromise — it's a constraint that forces good decisions. Spent in the right order, on the right five or six things, $500 is enough to take a dated, flat room and make it look considered, warm, and expensive. The secret isn't spending more; it's knowing exactly where every dollar does the most work.
This is a complete, step-by-step plan for how to make over a room for $500: what the budget realistically covers, a full cost breakdown, the exact order to spend in, and the specific changes that deliver the biggest visual return. No renovation, no new furniture — just a smarter version of the room you already have.
Set expectations
What $500 realistically transforms
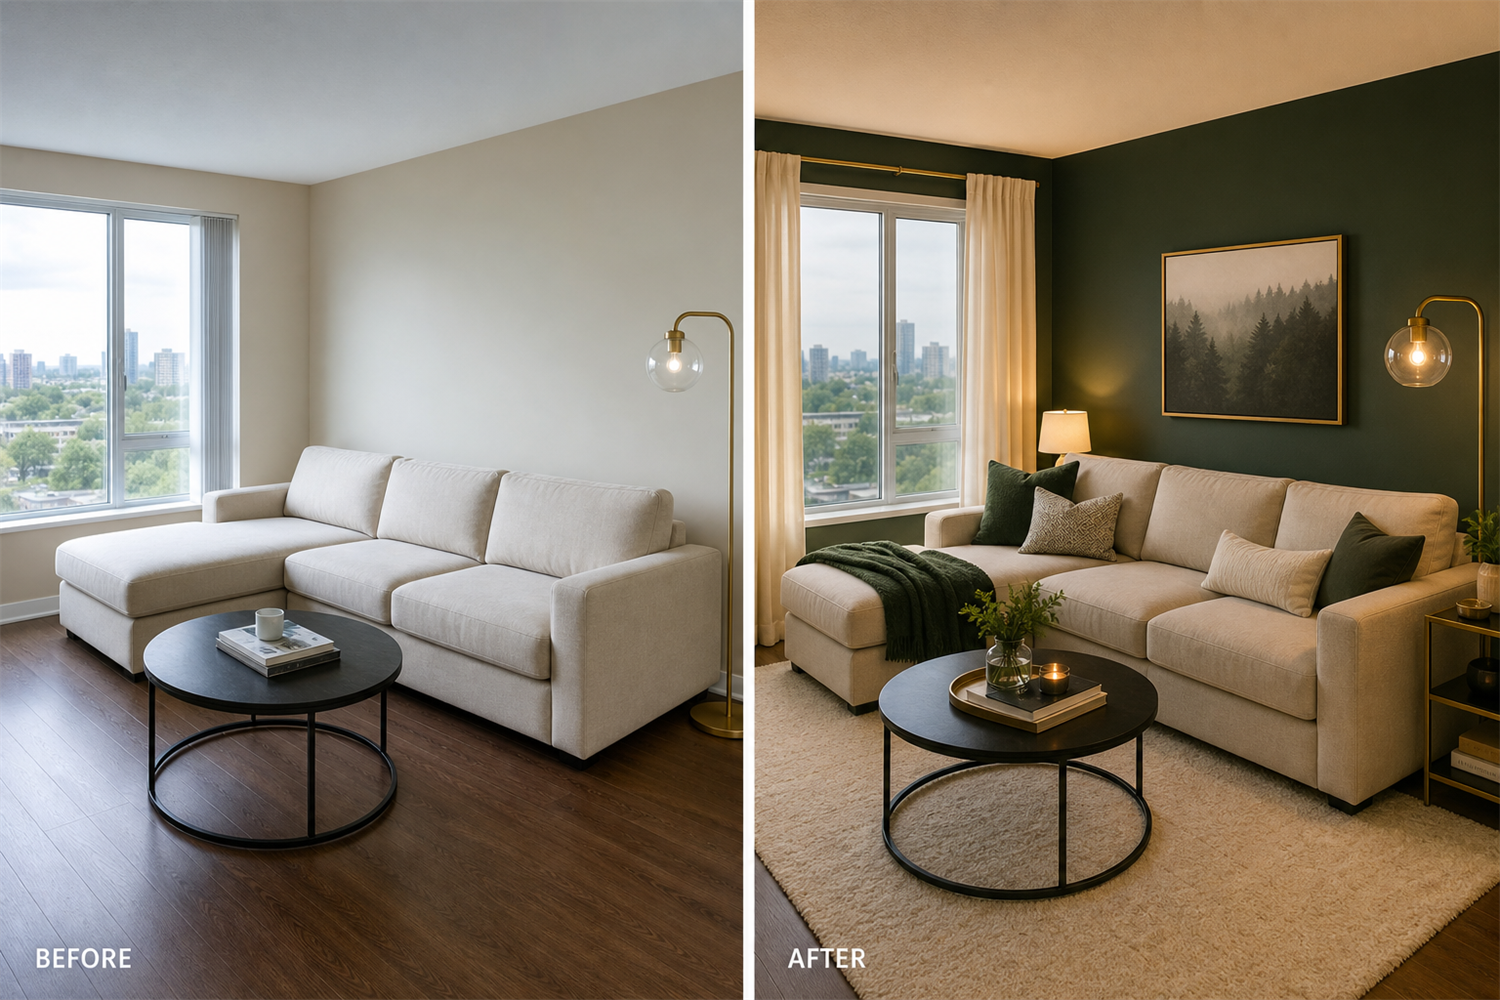
The first thing to get right is scope, because that's what keeps a $500 makeover from stalling halfway. At this budget you are not rebuilding the room — you are re-dressing it. The floor stays, the walls stay, and the large furniture stays. What changes is everything that controls how the room actually feels.
For a standard room — a bedroom, a home office, or a modest living room up to roughly 12 by 14 feet — $500 comfortably covers a fresh wall color, a proper lighting upgrade, a rug, curtains, and a few finishing pieces. That is more than enough to move a space from "builder-basic" to "designed." What it will not do is replace big-ticket items: a new sofa, a bed frame, or new flooring will eat the whole budget on its own and leave the rest of the room untouched.
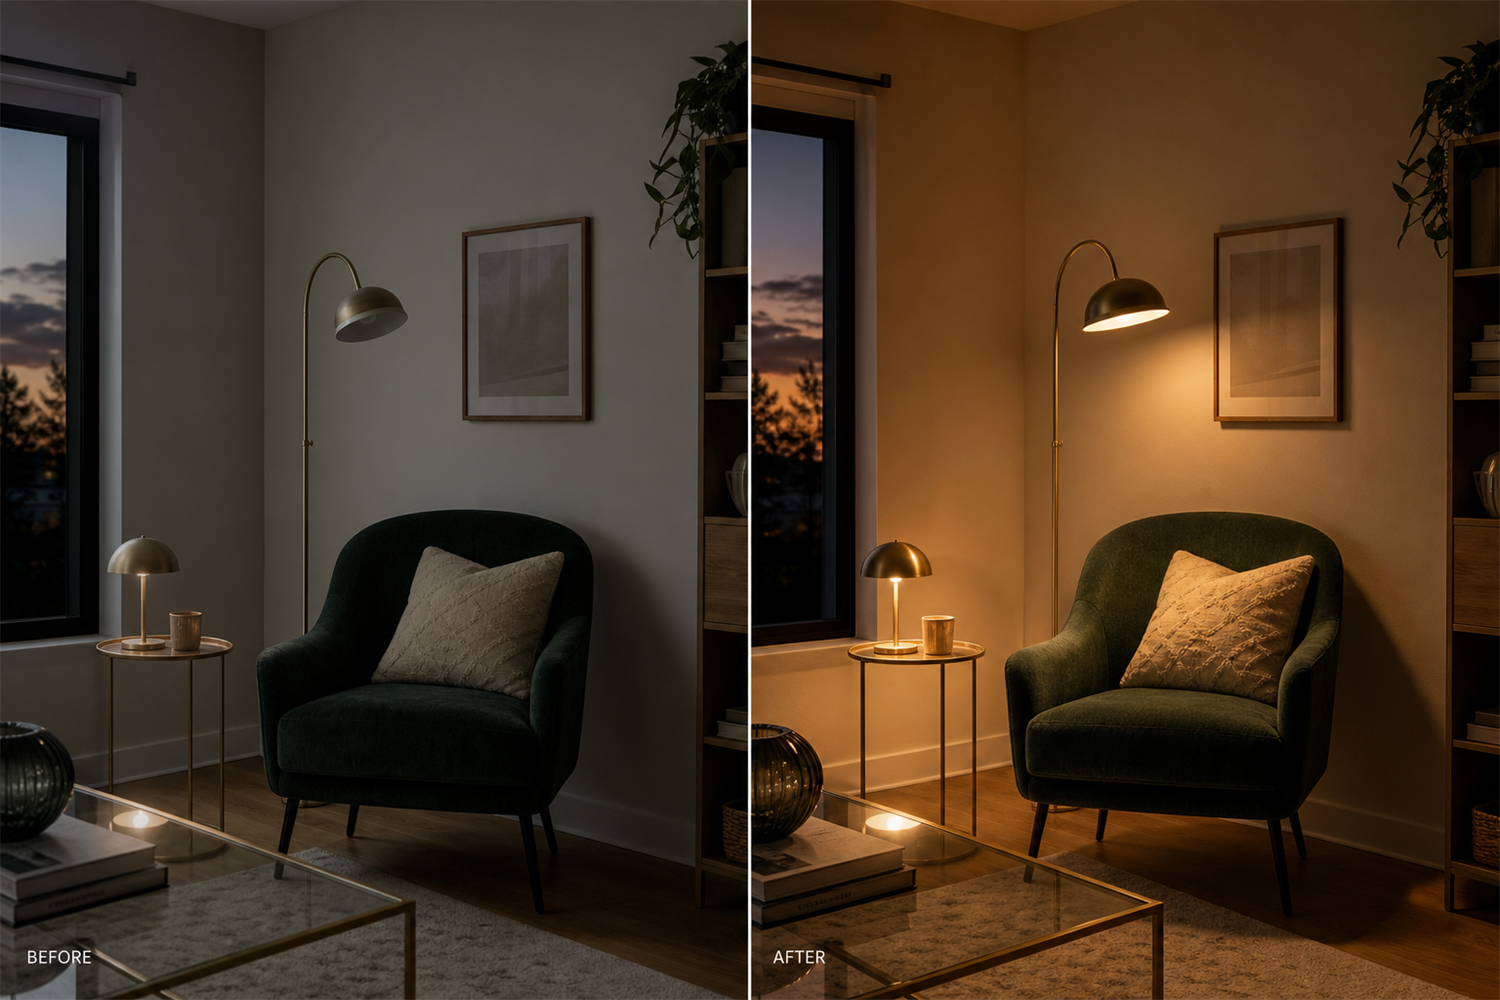
Same room, same furniture — only the color, light and soft furnishings changed.
That's the whole strategy of a budget room makeover: keep the bones, change the atmosphere. It's the same principle behind these before-and-after room makeover ideas under $500, and everything below is how you execute it — in the order that gives you the biggest visual return for every dollar.
The numbers
The $500 budget breakdown
Before you buy anything, decide where the money goes on paper — the same first step in how to create a room makeover budget that actually holds. The table below is a realistic allocation for a standard room. Treat it as a framework — actual prices swing with room size, your location, and sales — but the proportions hold true almost everywhere: the biggest share goes to textiles and lighting, because that's where "expensive" is actually bought.
A realistic way to split $500 across a standard room. Shift dollars between rows to fit your space.
Where the money goes
Typical spend
What it buys
Paint & supplies
$40–$80
One or two gallons plus a basic kit — the highest-impact dollar in the room.
Lighting (fixture, lamp, warm bulbs)
$80–$130
A statement light, one lamp, and warm bulbs throughout.
Rug, curtains & cushions
$150–$200
The single biggest driver of a warm, high-end feel.
Art, a mirror & finishing decor
$70–$120
The layer that makes the room look intentional.
Buffer (hardware, plants, small fixes)
$40–$60
Always leave room for the thing you forgot.
Total
~$500
Adjust the mix; keep the total honest.
Notice there is no line for furniture. That is deliberate, and it's the single most important rule of a $500 makeover: spend on atmosphere, not on big pieces.
Skip the guesswork
Get the $500 Room Makeover Planner
Everything on this page, done for you: a fill-in budget worksheet, the exact spend-in-order checklist, room-measurement guides, and a ready-to-shop list — so you transform your room the first time, without wasting a single dollar.
The free changes — do these before you spend a dollar
Some of the most dramatic improvements in a room makeover on a budget cost nothing at all, and you should always do them first — partly because they're free, and partly because they change how every paid upgrade will land. Spend an afternoon here before you buy anything.
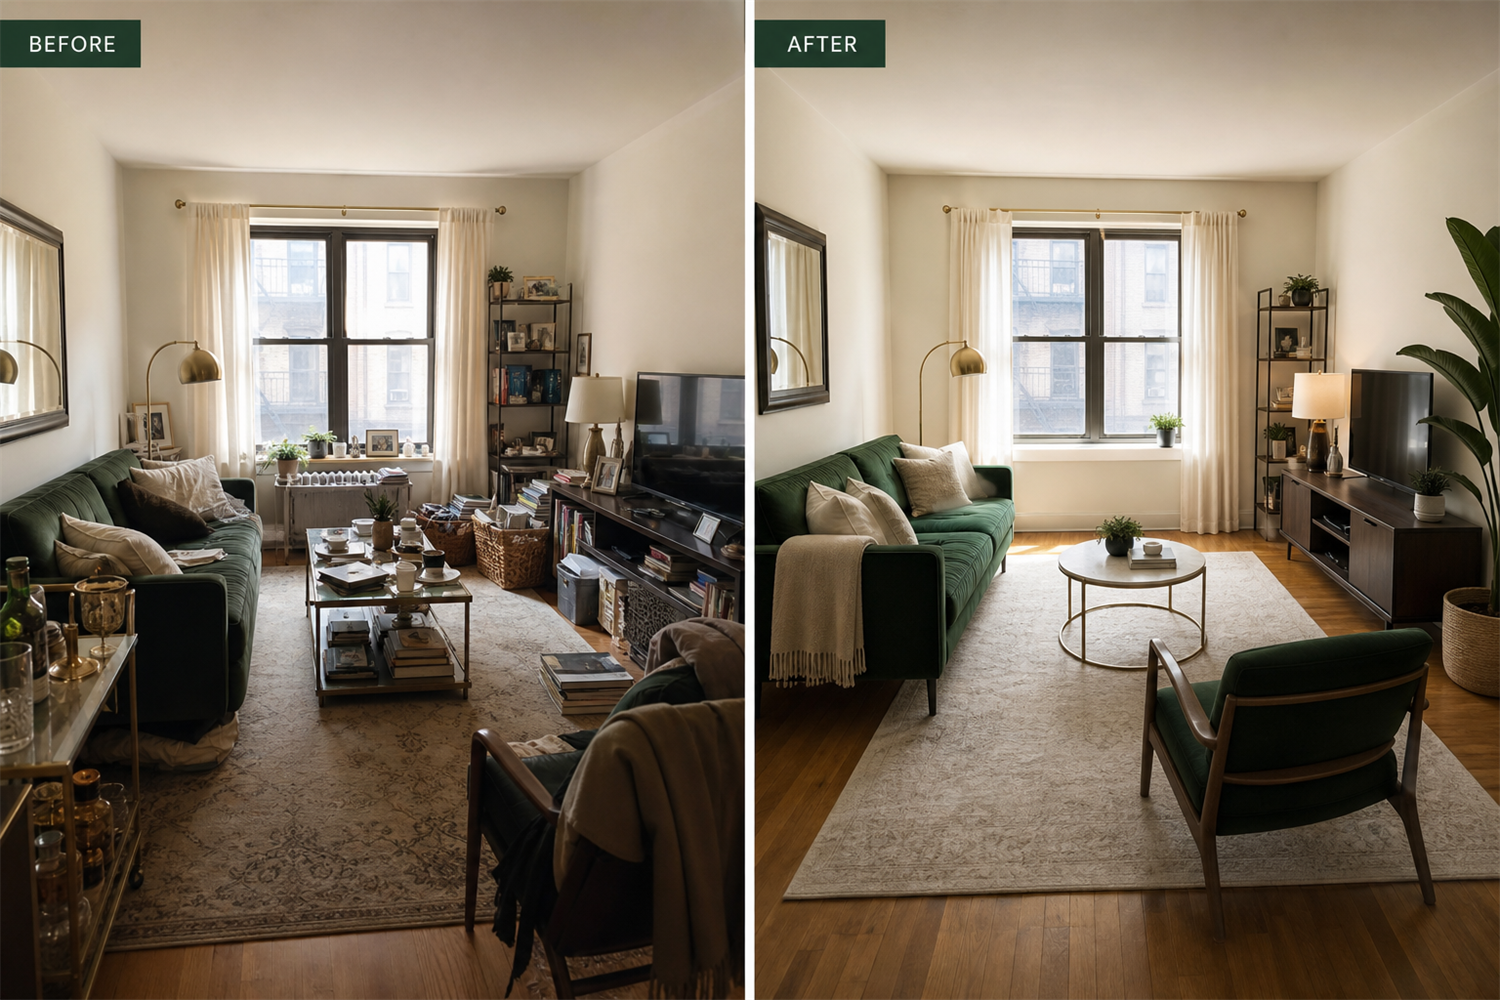
The free work first: edited surfaces and a smarter layout, before any spending.
Declutter down to what earns its place. Clear every surface and put back only one or two considered objects. Edit the shelves, remove the extra chair and the tangle of cords. A room with breathing space instantly reads as more expensive; a crowded room looks cheap no matter what's in it.
Rearrange the layout. Pull the furniture a few inches off the walls, angle a chair toward a natural focal point, and float the seating so it relates to a rug rather than hugging the perimeter. A few felt furniture sliders make it a five-minute job and protect your floors.
Deep clean the surfaces you stopped noticing. Wash the windows, wipe the baseboards, dust the fixtures. Clean, bright surfaces bounce more light and quietly lift the entire space. Only once the room is edited should you start spending.
2Step two
Paint is your highest-value $500 dollar
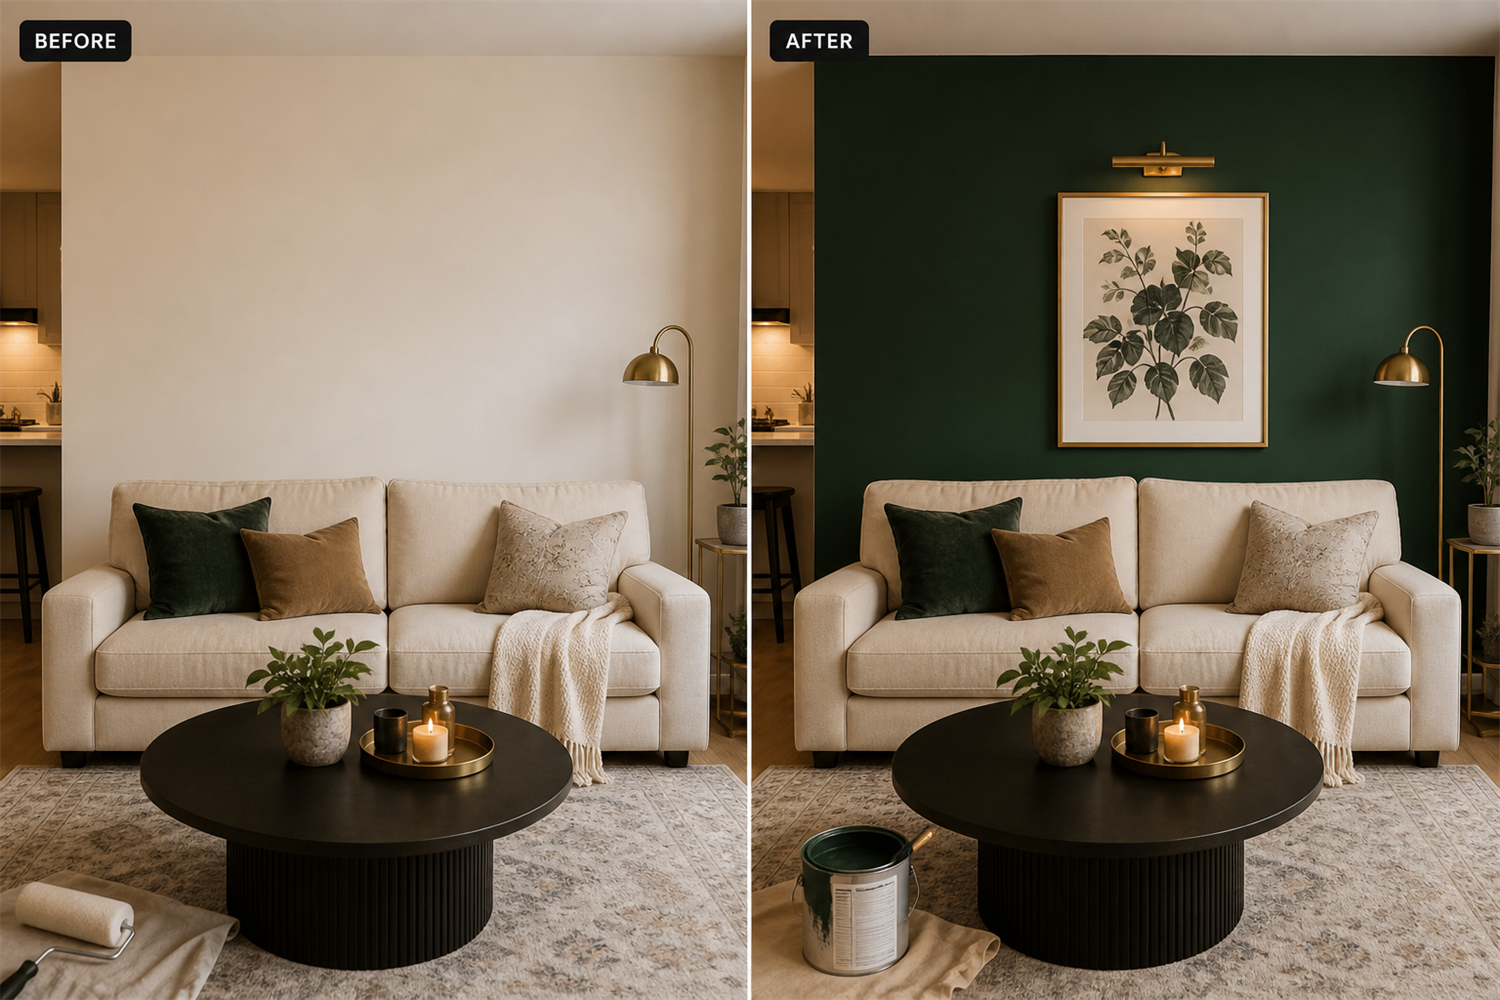
If you do only one paid thing, paint the room. Nothing else comes close to the return: a gallon or two of interior paint and primer plus a basic kit runs about $40 to $80, and it changes every square foot of the space. You rarely need to paint all four walls, either — a single feature wall in a deeper, richer color, behind the sofa or bed, delivers most of the drama for a quarter of the paint and effort.
One painted feature wall — under $80 — does most of the visual heavy lifting.
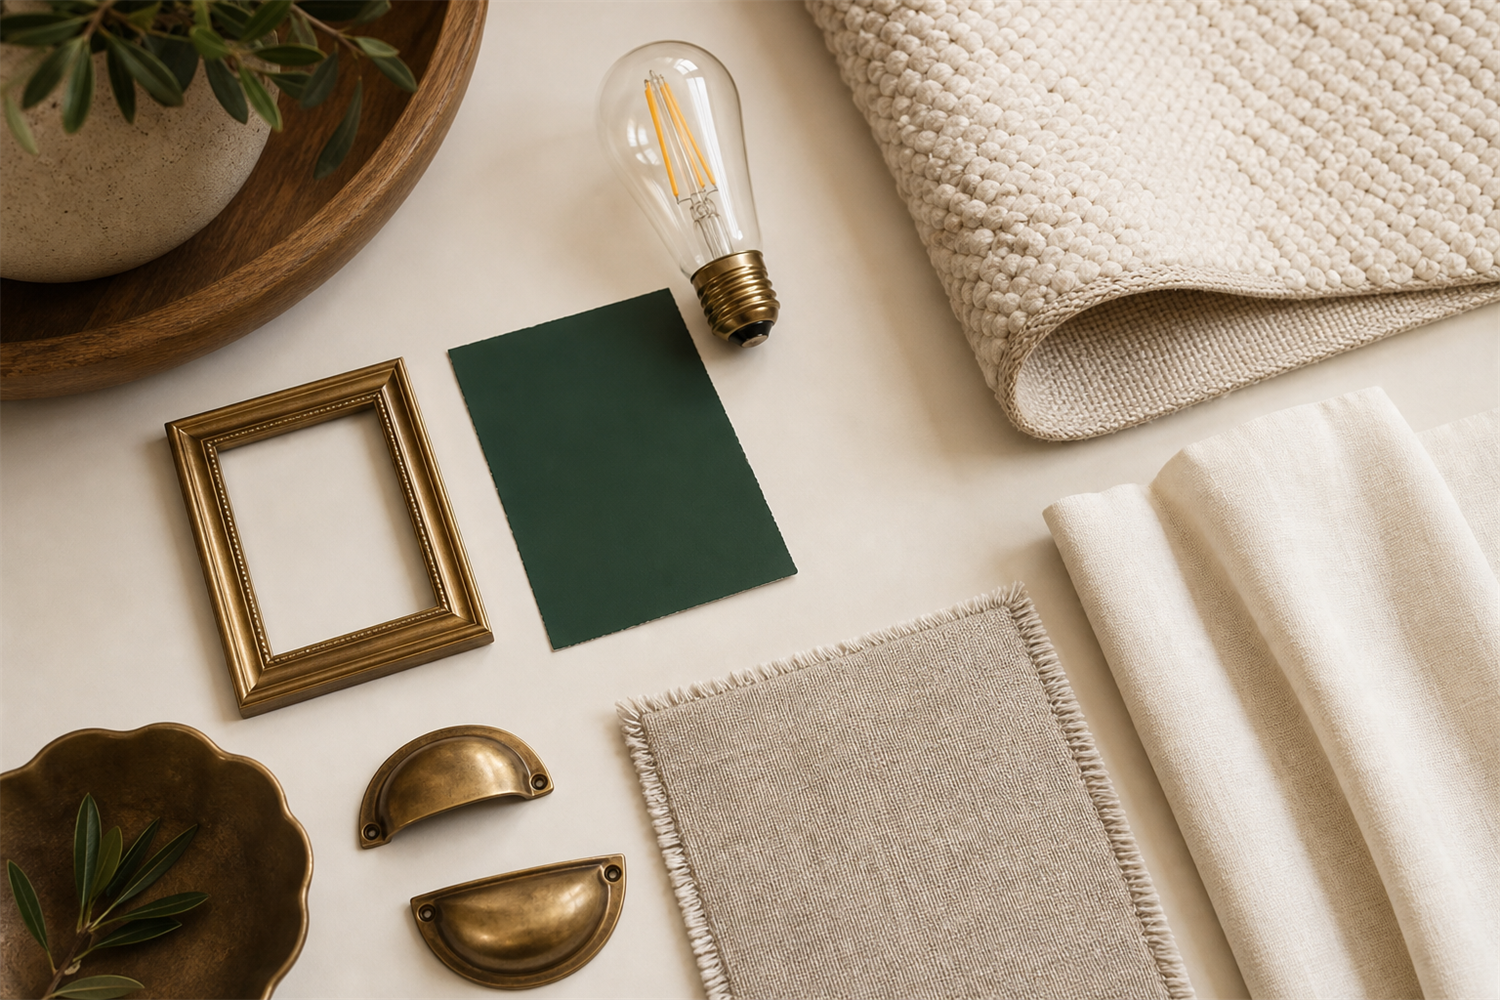
A moody green, a warm charcoal, or a soft clay instantly gives a flat room depth and a focal point. Renting? Peel-and-stick wallpaper gets the same effect and lifts off cleanly when you move. And don't stop at the walls — a crisp coat on tired trim and swapping dated handles for warm brass or matte-black hardware are small, cheap moves that read as genuinely custom.
✦ Shop this look
Interior paint & primer — one gallon covers most feature wallsShop
Peel-and-stick wallpaper — renter-safe, no paste, big impactShop
Brass or matte-black hardware — swap dated handles for an instant liftShop
Keep it in budget: One accent wall plus refreshed hardware usually lands around $50–$70 total, leaving the bulk of your $500 for the layers that add warmth.
3Step three
Lighting that looks expensive
Lighting is the most underrated line in any budget makeover, and it's very often the real reason a room looks "expensive" — or doesn't. A single harsh ceiling bulb flattens everything it touches. Warm, layered light does the opposite: it gives the room depth and makes even inexpensive pieces glow — it's the core idea behind affordable lighting that looks expensive. Budget about $80 to $130 here and it pays for itself in atmosphere.
Layered, warm light on 2700K bulbs is what makes a room feel golden rather than gray.
Layer three kinds of light: one main fixture, one or two table or floor lamps at different heights, and a low accent glow. If you can't rewire, a plug-in wall sconce gives the same designer look with no electrician. Then fix the bulbs — put every one on a warm 2700K bulb. Mismatched, cold bulbs are a quiet reason rooms feel like rentals, and a warm set costs only a few dollars.
✦ Shop this look
Table & floor lamps — layer light at different heightsShop
Plug-in wall sconce — no rewiring, adds a light layerShop
Warm 2700K LED bulbs — the cheapest upgrade with the biggest effectShop
4Step four
Rugs, curtains & textiles — where warmth lives
Textiles are the biggest single slice of your $500 — plan on $150 to $200 — and they earn it. Soft furnishings are where a room gets its warmth, and where a modest budget can genuinely look luxurious. Two of them matter most: the rug and the curtains.
A large rug and curtains hung high and wide instantly make the room feel warm and finished.
Get the rug size right — a rug that's too small makes a room look cheap; if you're unsure, check what size rug fits a living room and go larger than feels natural, so the front legs of the sofa and chairs sit on a large area rug. Hang curtains high and wide — mount the rod close to the ceiling and extend it past the window on each side. Floor-length curtain panels that just kiss the floor make ceilings look taller. Finish with a few layered cushions and a throw in mixed textures.
✦ Shop this look
Large area rug — size up so the furniture sits on itShop
Curtain panels — floor-length, hung high and wideShop
Throw pillows & blanket — mix textures for a collected feelShop
Your makeover, mapped out
Plan it once — and get it right
The $500 Room Makeover Planner turns this guide into a done-for-you system: a budget tracker, a priority shopping list, and measurement worksheets you can take straight to the store. No overspending, no half-finished rooms — just a room you love.
This is the last layer — the roughly $70 to $120 that makes people ask whether you hired a designer. With most of the budget already spent, the finishing touches are about restraint and a few well-chosen pieces, not filling every surface.
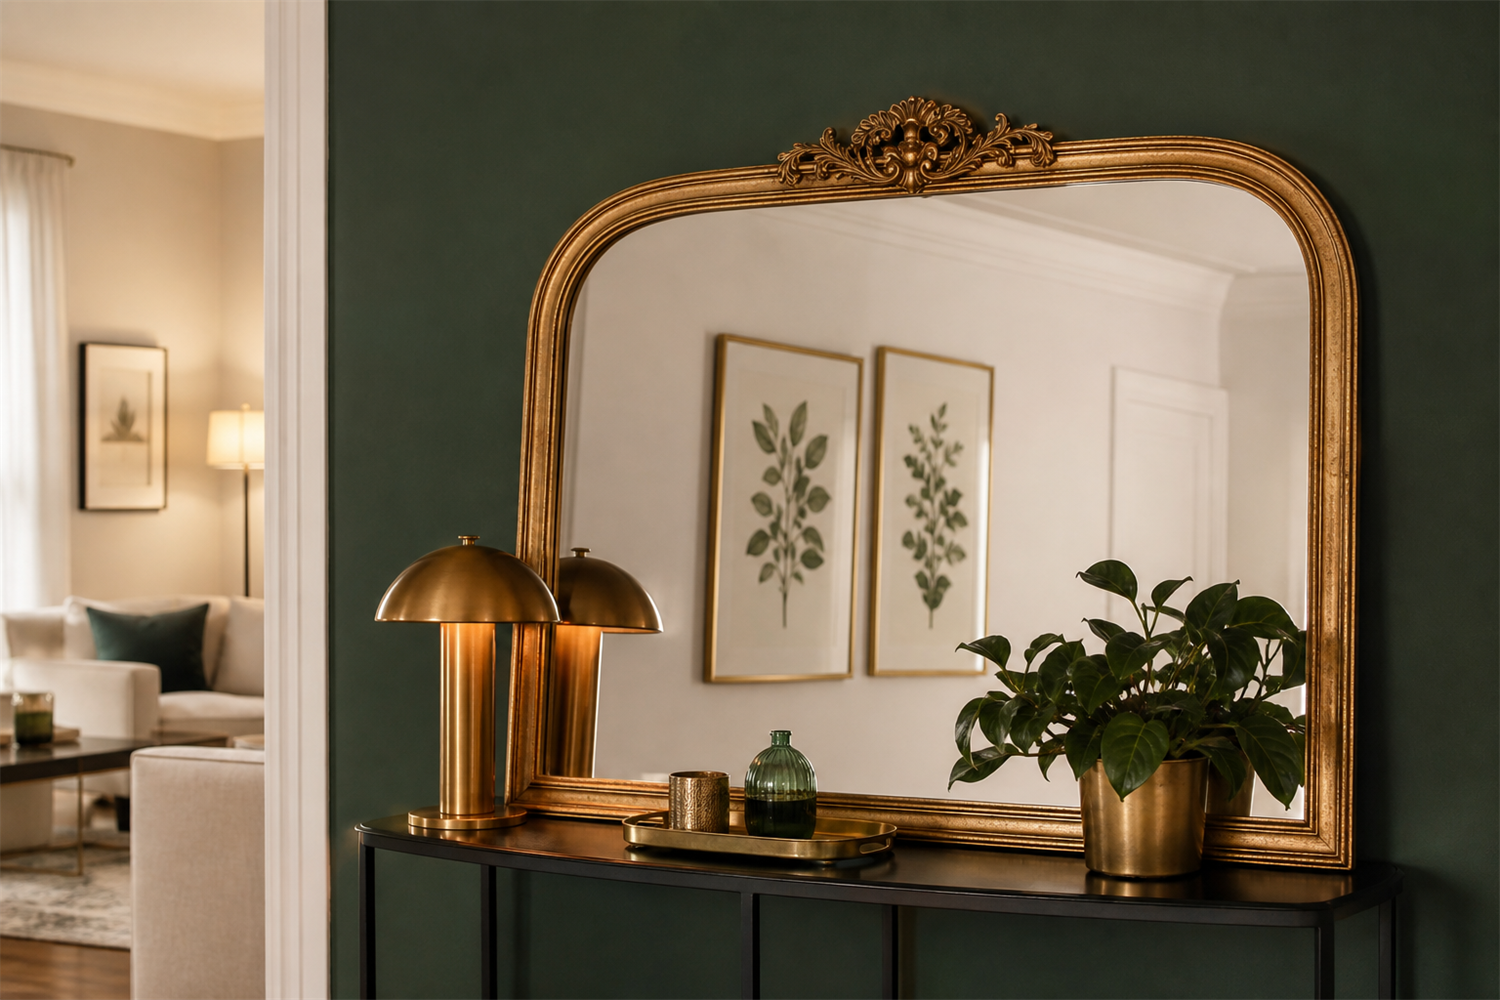
Framed art and a mirror to bounce light — the finishing layer that reads 'designed'.
Choose art you love, and go bigger than you think. One larger piece almost always looks more expensive than several small ones — printable wall art in good frames is the budget secret. Add a mirror — an oversized wall mirror bounces light deeper into the room and visually doubles the sense of space. Then stop: style a decorative tray, add a little greenery, and edit until the room feels calm rather than crowded.
✦ Shop this look
Picture frames & wall art — a cohesive set reads as a gallery wallShop
Oversized wall mirror — bounces light and widens the roomShop
Decorative tray & vase — the styled, intentional finishShop
Priority order
What to buy first: the exact $500 order
When the budget is tight, sequence matters as much as choice. Spend in this order, and if you run out of money partway down the list, you'll already have captured the biggest visual wins:
The essentials, in the order to buy them.
Nothing — the free work. Declutter, rearrange, and deep clean before a single purchase.
Paint (~$40–$80). One feature wall plus refreshed hardware — the biggest change per dollar.
Lighting (~$80–$130). A fixture or lamp, and warm 2700K bulbs throughout.
A properly sized rug (~$80–$130). The piece that anchors and warms the room.
Curtains (~$40–$70). Hung high and wide for instant height.
Art & a mirror (~$70–$120). The finishing layer, last.
If the money runs out early: stop and enjoy it. A room finished through the rug step already looks intentional — the last layers can wait for next month.
Designer tricks
How to make a $500 room look expensive
Beyond the shopping, a handful of no-cost habits are what actually make a budget room read as high-end — the same designer moves in how to make your home look expensive on a budget. Apply these as you go and the same pieces look twice their price:
Commit to one palette. A warm neutral base, one deeper accent, and a single metal finish throughout. Cohesion reads as expensive; a mix of everything reads as cheap.
Buy fewer, larger things. One oversized mirror, one big rug, one large artwork — always more luxurious than lots of small pieces.
Give the room negative space. Empty, considered surfaces signal quality. Resist the urge to fill every corner.
Keep light warm and low. Several small warm light sources at different heights beat one bright ceiling light every time.
Hang art and curtains at the right height. Art centered at eye level; curtains near the ceiling.
Layer textures. Linen, wool, wood, ceramic, a little metal — texture is what makes inexpensive things feel considered.
Ready to start your makeover?
The $500 Room Makeover Planner
Stop second-guessing every purchase. Get the printable budget worksheet, spend-in-order checklist, room-measurement guides, and shopping list — an instant download you'll reach for on every room in your home. One small purchase, every dollar in the right place.
Buying big furniture. One large piece can swallow the entire $500 and leave the rest of the room untouched. Refresh what you own instead.
Spreading the money too thin. A dozen small trinkets rarely add up to a designed room. Put the budget into a few pieces that change how the whole space reads.
Skipping the lighting. It's the most common reason a budget room still looks like a rental — and one of the cheapest fixes on the list.
Choosing a rug that's too small. The clearest budget "tell" there is. Size up; it changes everything.
Shopping without a plan. Buying before you've written down your $500 allocation is how people end up out of money with a half-finished room.
Get new room makeovers first
Join the Decor Glam Chic list for new budget makeovers, step-by-step guides, and subscriber-only planner offers.
Good to know
Frequently asked questions
Can you really make over a room for $500?
Yes. For a standard-sized room, $500 is enough for a full visual transformation when you spend on paint, lighting, textiles and styling rather than replacing large furniture. Bigger rooms or projects that include a new sofa or bed will cost more.
What should I spend my $500 on first?
Do the free work first — declutter and rearrange — then spend in this order: paint, lighting and warm bulbs, a properly sized rug, curtains, and finally art and a mirror.
How do I make a room look expensive on a budget?
Warm, layered lighting; a rug large enough that the furniture sits on it; curtains hung high and wide; a cohesive color palette; and a few large pieces instead of many small ones.
How much does it cost to paint a room?
For a standard room, one to two gallons of paint plus a basic kit usually runs about $40 to $80 — which is why paint is the highest-return change in a $500 makeover.
How long does a $500 room makeover take?
Once your supplies arrive, most $500 makeovers come together over a single weekend — a day for paint and prep, and a day for lighting, textiles and styling.
In short
Your $500, well spent
A beautiful room was never about the size of the budget — it's about spending a small one in the right order. Do the free work, let paint and warm light do the heavy lifting, put the biggest share into a proper rug and curtains, and finish with a piece of art and a mirror. Follow that sequence and $500 buys a room that feels calm, warm, and quietly expensive — no renovation required.
Your makeover, done right
Get every dollar in the right place
The $500 Room Makeover Planner turns this whole guide into a fill-in system — budget worksheet, spend-in-order checklist, room-measurement guides, and a ready-to-shop list. Plan it once, shop with confidence, and get a room you love without overspending.
The exact spend order so you capture the biggest wins before the money runs out.
Written by
Decor Glam Chic
Decor Glam Chic is a home décor studio helping you create a beautiful, high-end home on a real budget. We share step-by-step room makeovers, affordable decorating ideas, and printable planners that show you how to make any space look expensive for less — one room, and one smart dollar, at a time. Browse our planners & printables →